GoDaddy DNS for Bento
Add Bento's authentication + tracking records inside GoDaddy so every email is signed, trusted, and policy-compliant.
Google and Yahoo now require authenticated traffic for any sender crossing 5,000 messages per day. Publish these records before you scale.
Prerequisites
- Access to your GoDaddy account with the correct domain.
- Permissions to edit DNS (the domain must be using GoDaddy nameservers).
- Your Bento DNS record list from System → DNS.
Required DNS records
      example              CNAME  example.test.sendgrid.net
bbb._domainkey       CNAME  bbb.domainkey.example.test.sendgrid.net
bbb2._domainkey      CNAME  bbb2.domainkey.example.test.sendgrid.net
bento                CNAME  ga.bentoemail.com
bento3180._domainkey TXT    k=rsa; p=example...
_dmarc               TXT    v=DMARC1; p=quarantine; adkim=s
Each domain receives unique hostnames—copy/paste from Bento to avoid mistakes.
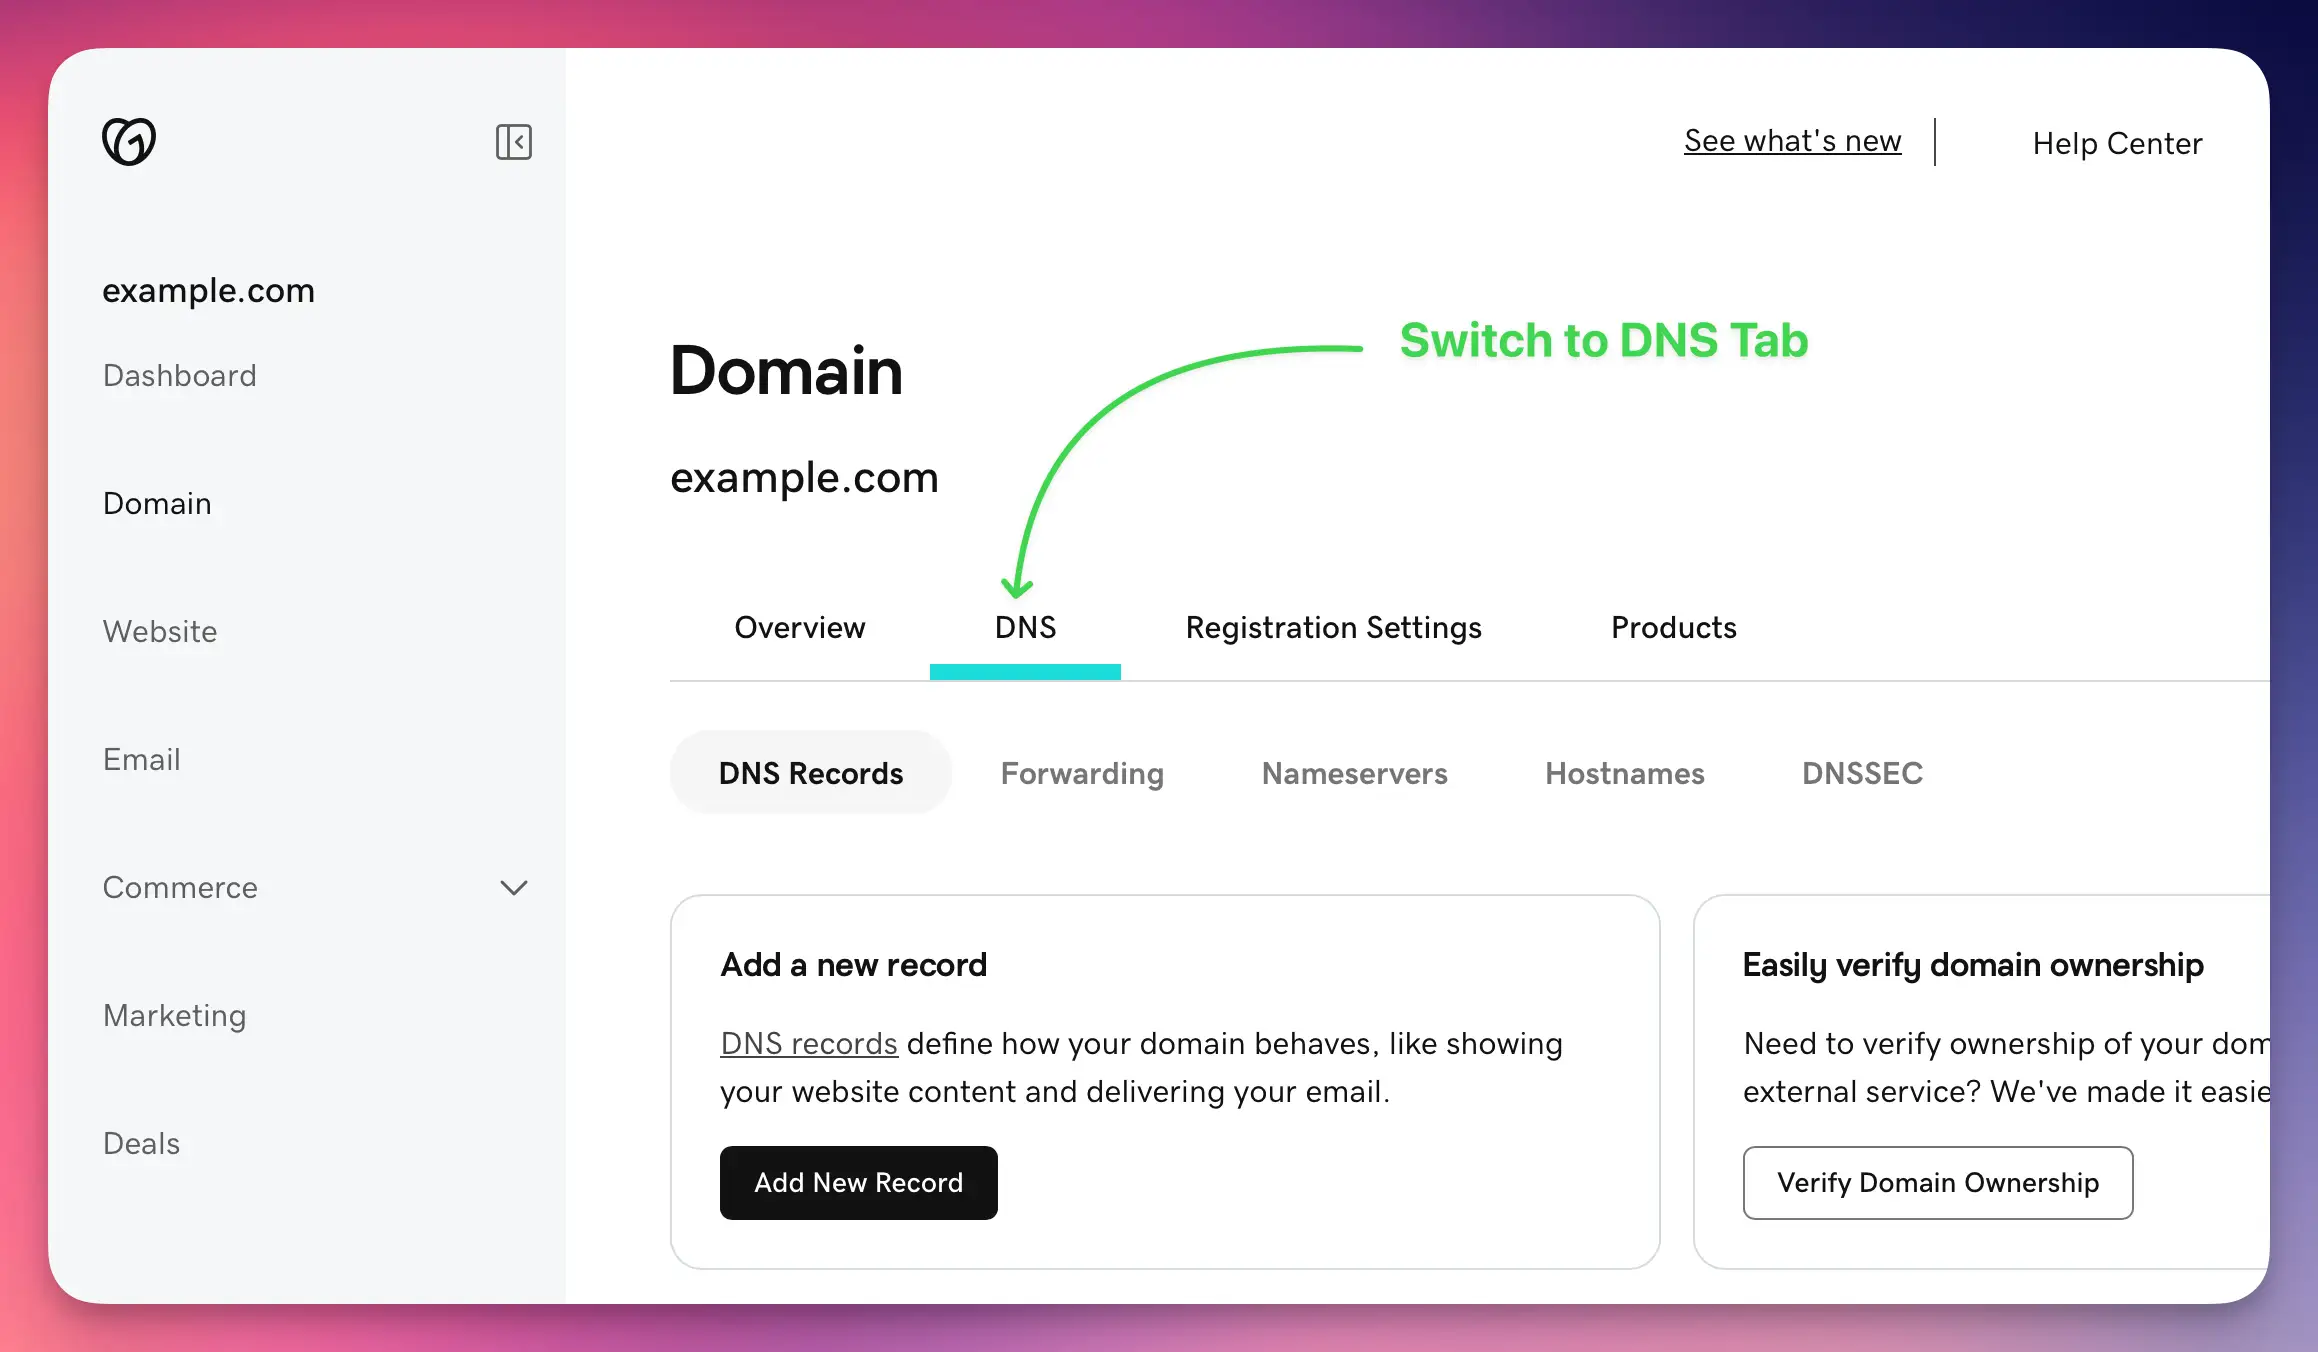
Step 1
Open GoDaddy DNS management
- Log into godaddy.com.
- Navigate to My Products.
- Find your domain and click the DNS button.
- If the button is missing, your nameservers point elsewhere—edit DNS where the zone actually lives.
Step 2
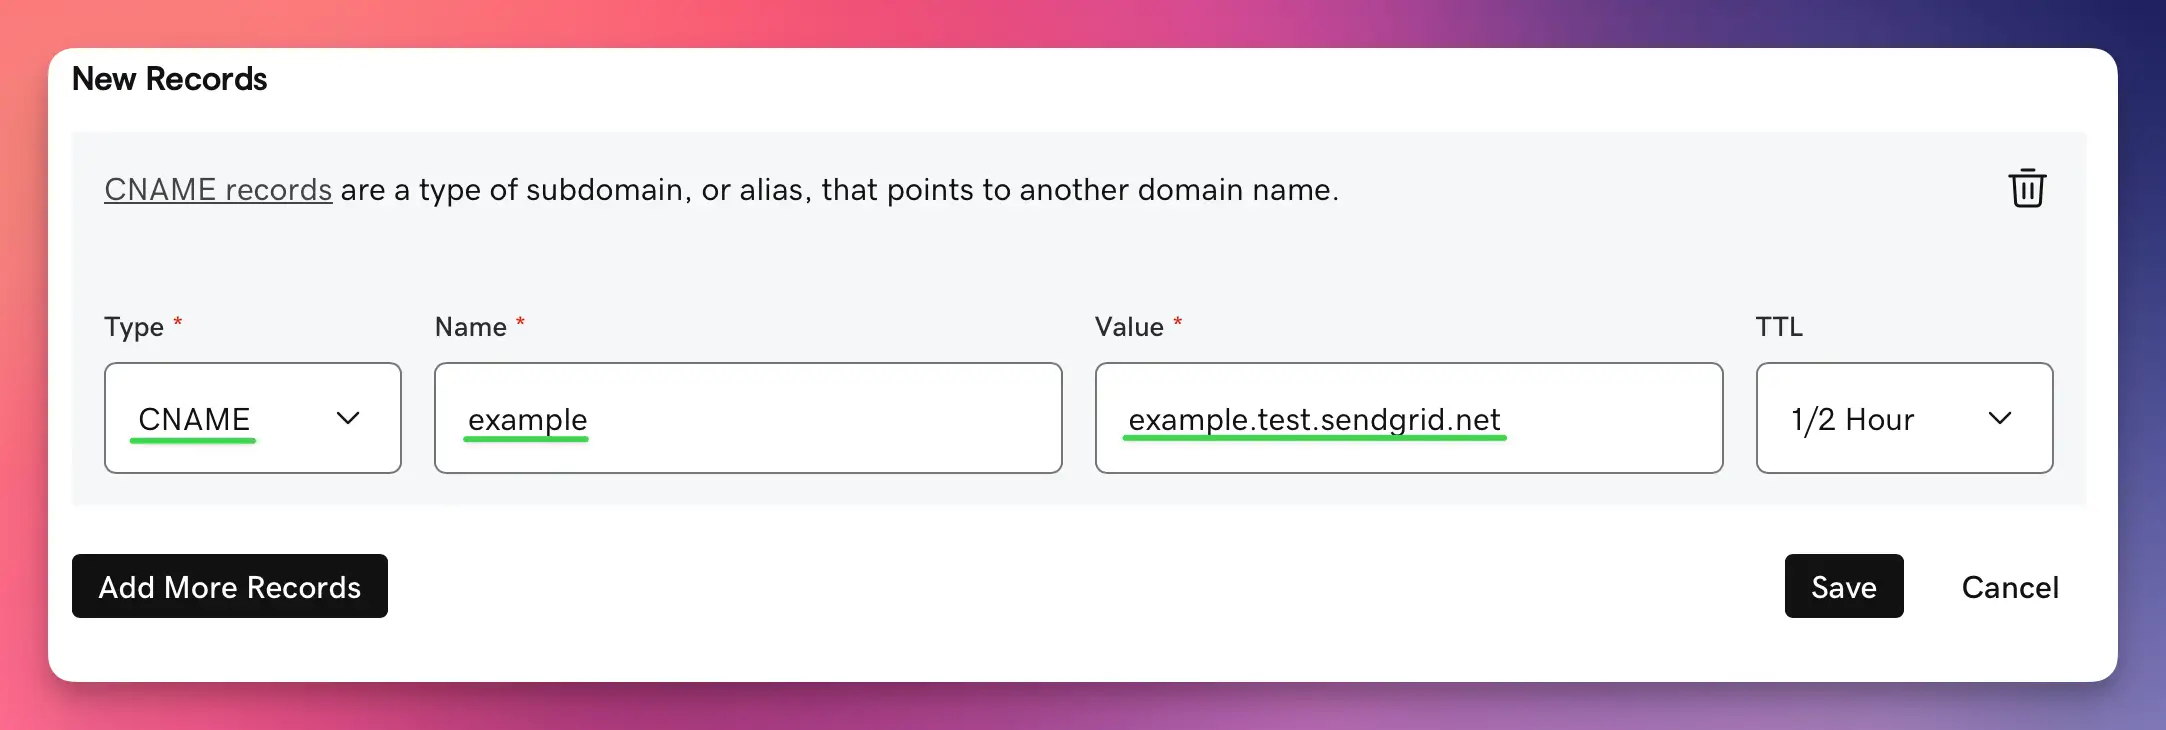
Add the CNAME records
- Click Add → choose CNAME.
- In Host, enter the Bento host (for example
exampleorbbb._domainkey). - In Points to, paste the exact target domain.
- Set TTL to 1 hour (or leave the default).
- Save and repeat for the remaining three CNAMEs.
GoDaddy uses Host/Points to terminology—other guides may call them Name/Value.
Use your Bento hosts. Do not overwrite unrelated CNAMEs already in the zone.
Step 3
Add the TXT records
- Add the DKIM TXT record—Host is the value ending in
_domainkey, and TXT Value is the entire key. - Create the DMARC TXT record with Host
_dmarcand Bento's recommended policy. - Use the 1 hour TTL or stick with the default.
If GoDaddy complains about length, split the TXT string into quoted chunks ("part1" "part2").

Step 4
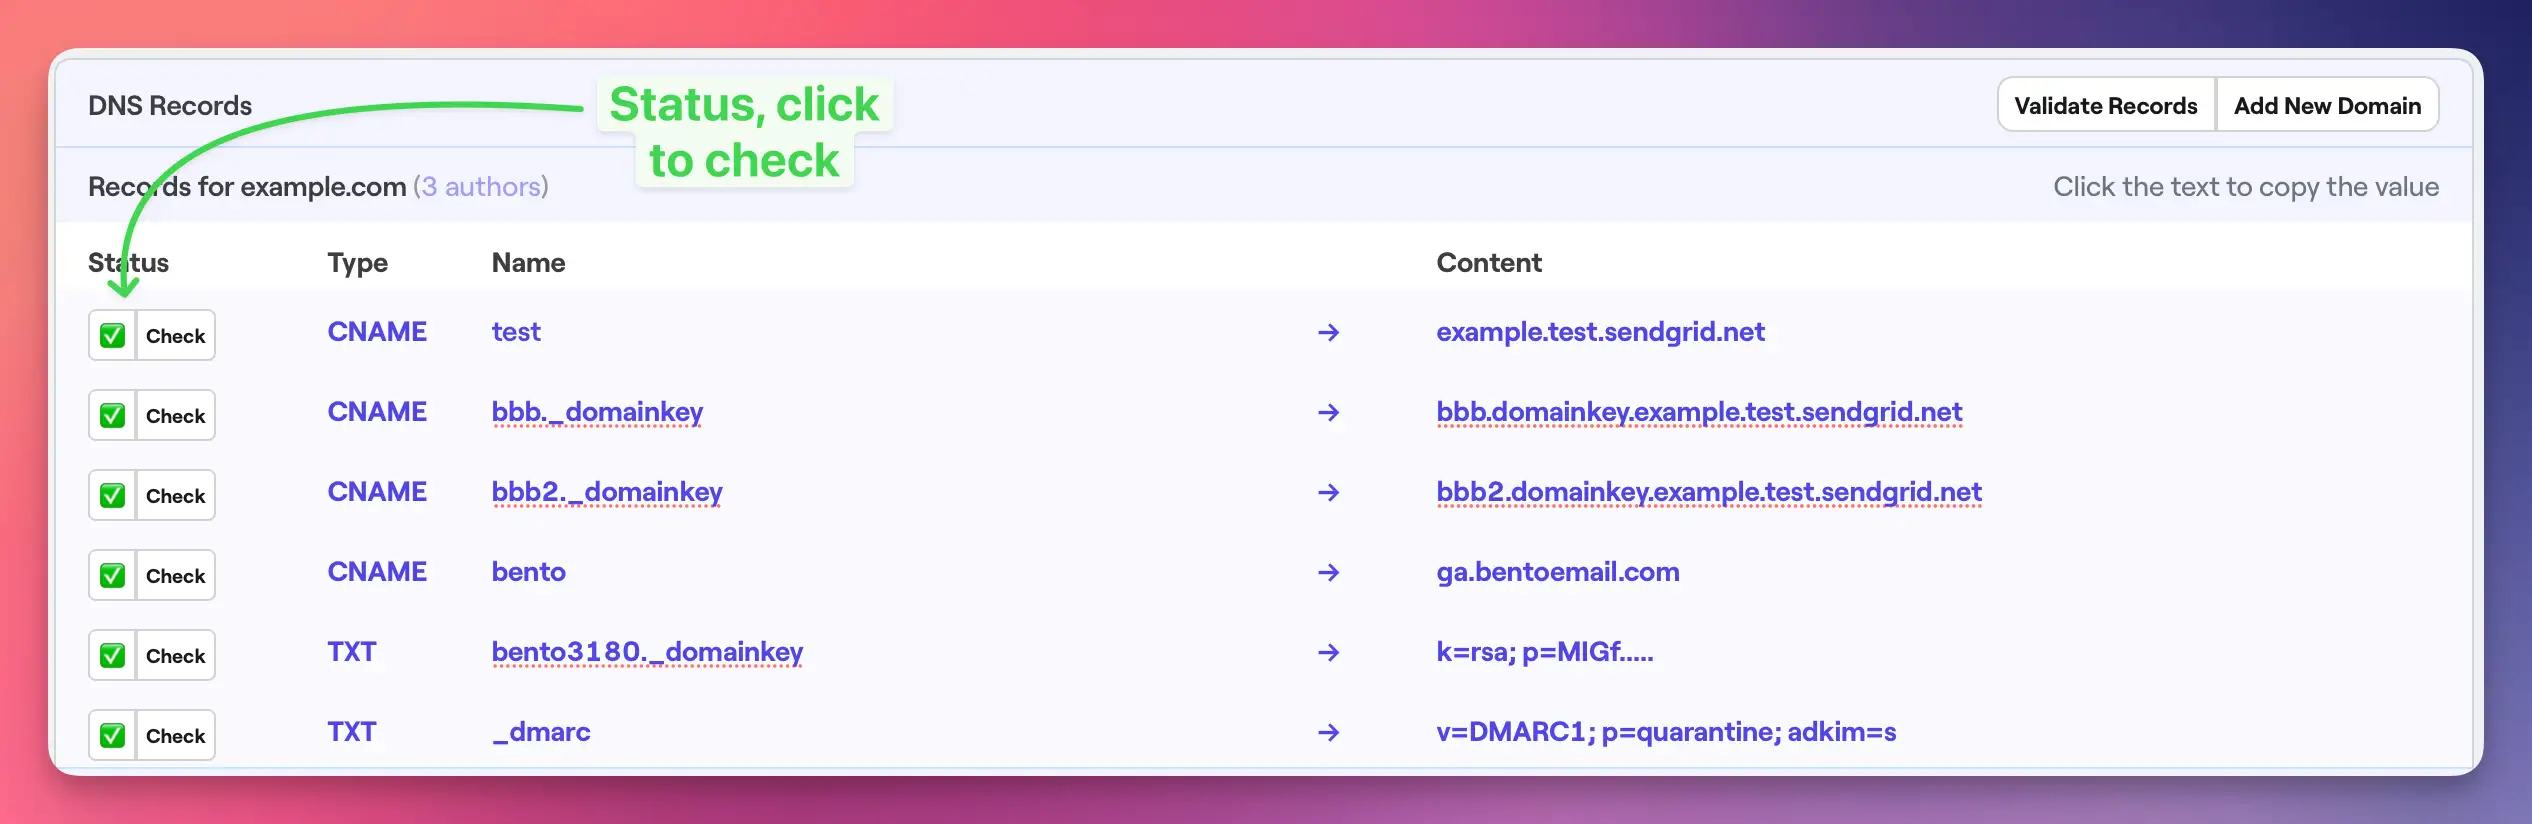
Verify inside Bento
- Return to System → DNS in Bento.
- Wait 5–10 minutes (some providers take longer—plan for up to 48 hours).
- Click Check next to each record until they all turn green.
Do not edit existing records unless you are certain they belong to Bento.
Step 5
Final checks
- Four CNAMEs with the right Host/Points to pairs.
- Two TXT records (DKIM + DMARC) matching Bento's values.
- All records saved (GoDaddy requires clicking the green checkmark).
GoDaddy-specific notes
- Use `@` as the Host for root-level records (for example DMARC if you send from the apex domain).
- Long TXT strings may require splitting into multiple quoted segments.
- GoDaddy queues DNS changes quickly, but some ISPs cache for hours—be patient before retrying verification.
Next steps
- Send a test email once Bento shows all green checks.
- Monitor deliverability for the first few campaigns.
- Leave DNS untouched unless Bento support instructs you to rotate keys.
Need help? Share screenshots in the Bento Discord or reply to the onboarding email and we'll walk through it.