Hover DNS for Bento
Publish Bento's authentication + tracking records inside Hover so Gmail/Yahoo trust every email you send.
Any sender delivering 5,000+ messages per day must publish SPF, DKIM, and DMARC per Gmail/Yahoo's 2024 rules.
Prerequisites
- Access to the Hover account that owns the domain.
- The domain must use Hover's DNS (nameservers must point to Hover).
- Your Bento DNS bundle from System → DNS.
Required DNS records
      example              CNAME  example.test.sendgrid.net
bbb._domainkey       CNAME  bbb.domainkey.example.test.sendgrid.net
bbb2._domainkey      CNAME  bbb2.domainkey.example.test.sendgrid.net
bento                CNAME  ga.bentoemail.com
bento3180._domainkey TXT    k=rsa; p=example...
_dmarc               TXT    v=DMARC1; p=quarantine; adkim=s
Copy/paste the exact hosts from Bento. Hover displays the domain suffix for you, so avoid retyping it.
Step 1
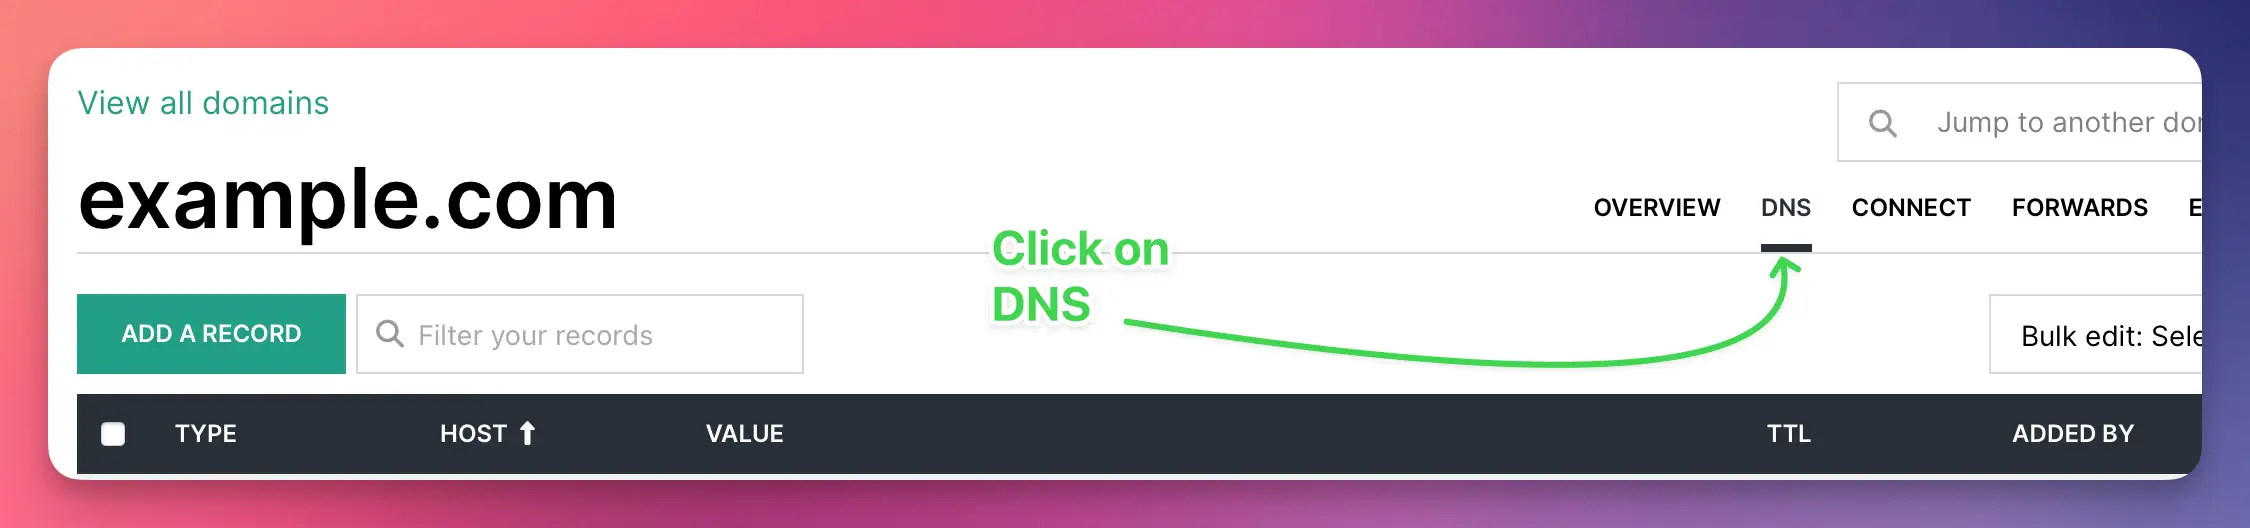
Open Hover DNS
- Sign in at hover.com.
- Go to Domains and choose the sending domain.
- Click the DNS tab to edit the zone file.
- If DNS is disabled, the domain is delegated elsewhere—manage records where the zone actually lives.
Step 2
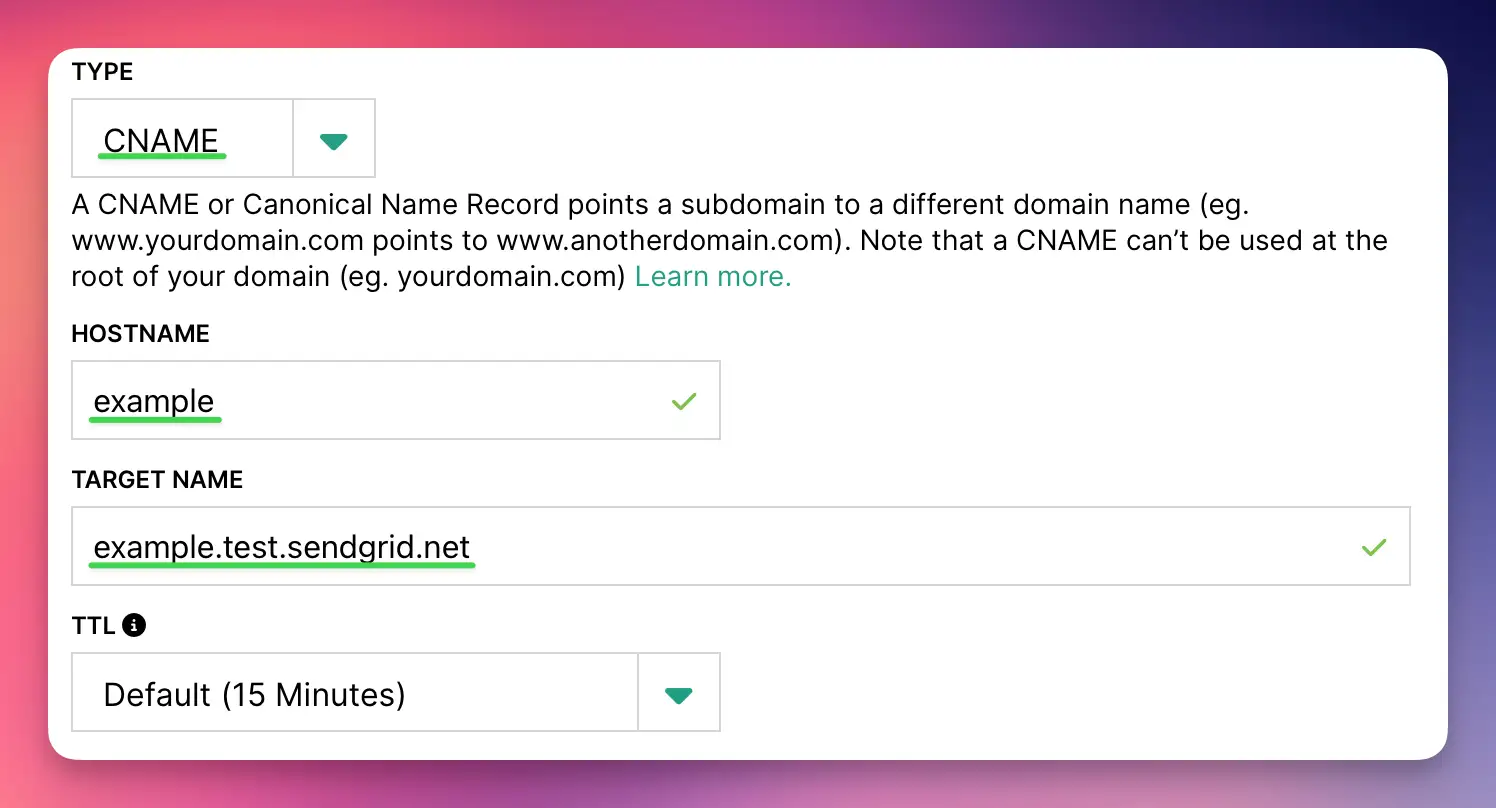
Add the CNAME records
- Click Add new and pick CNAME.
- Enter the Bento host in Host Name (example, bbb._domainkey).
- Paste the target hostname into Target Name.
- Leave TTL at 1 hour.
- Save and repeat until all four CNAMEs exist.
Never replace unrelated CNAMEs—only add the records Bento provides.
Step 3
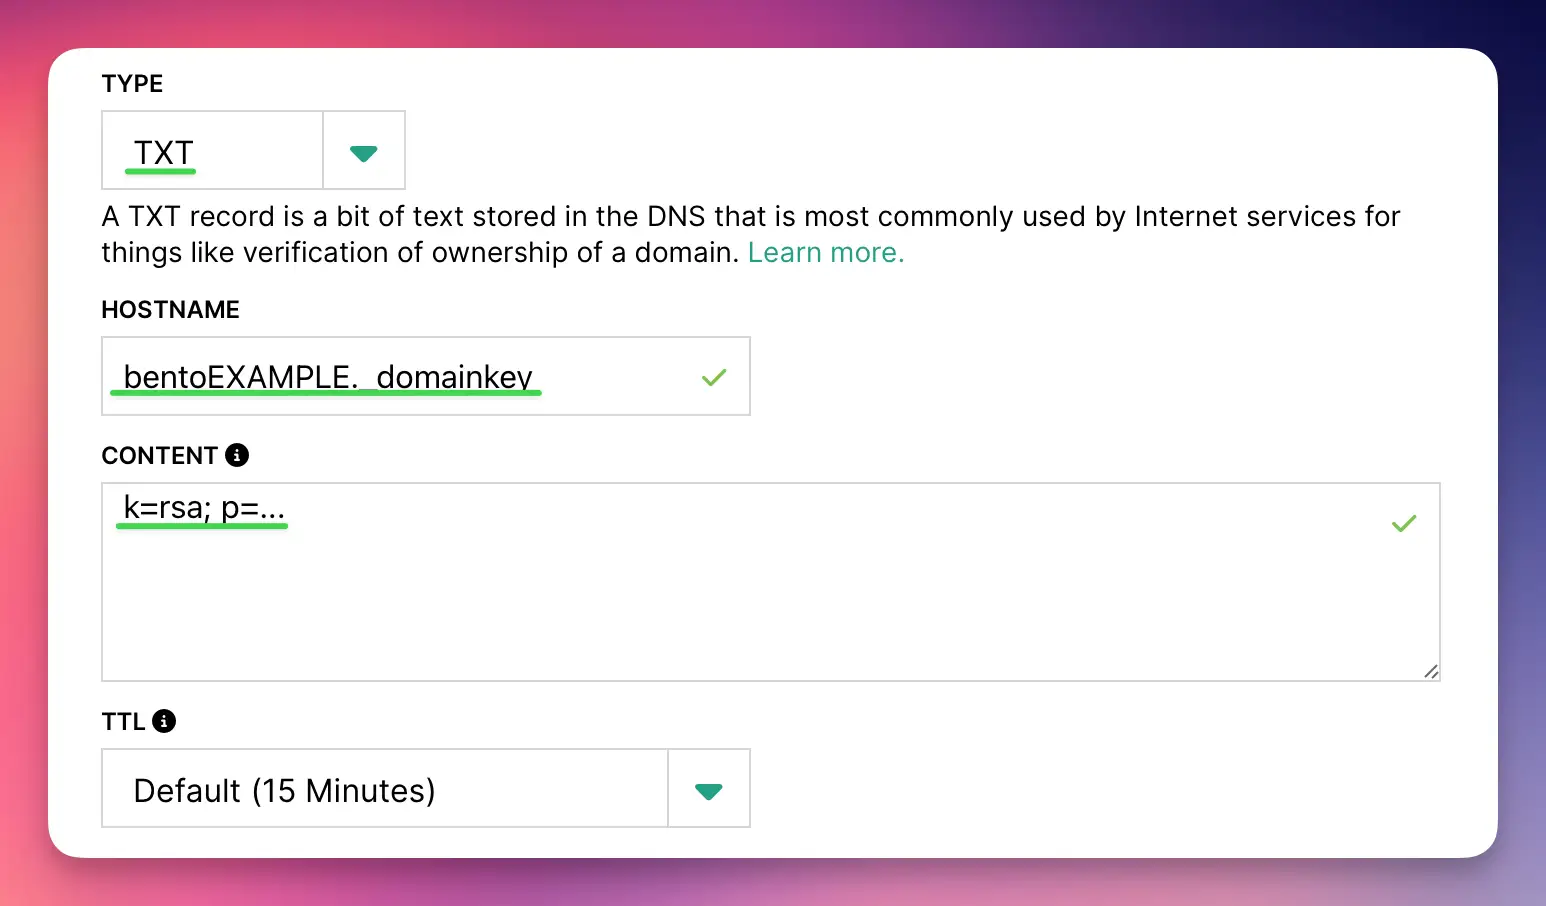
Add the TXT records
- Click Add new again and choose TXT.
- For DKIM, set Host Name to the Bento selector (for example
bento1234._domainkey). - Paste the full DKIM value that starts with
k=rsa;. - Add a second TXT record for DMARC using host
_dmarcand the Bento policy string. - Save after each record—the change won't persist until Hover shows a confirmation toast.
Hover does not insert quotes automatically. Paste the TXT value exactly as Bento displays it.
Step 4
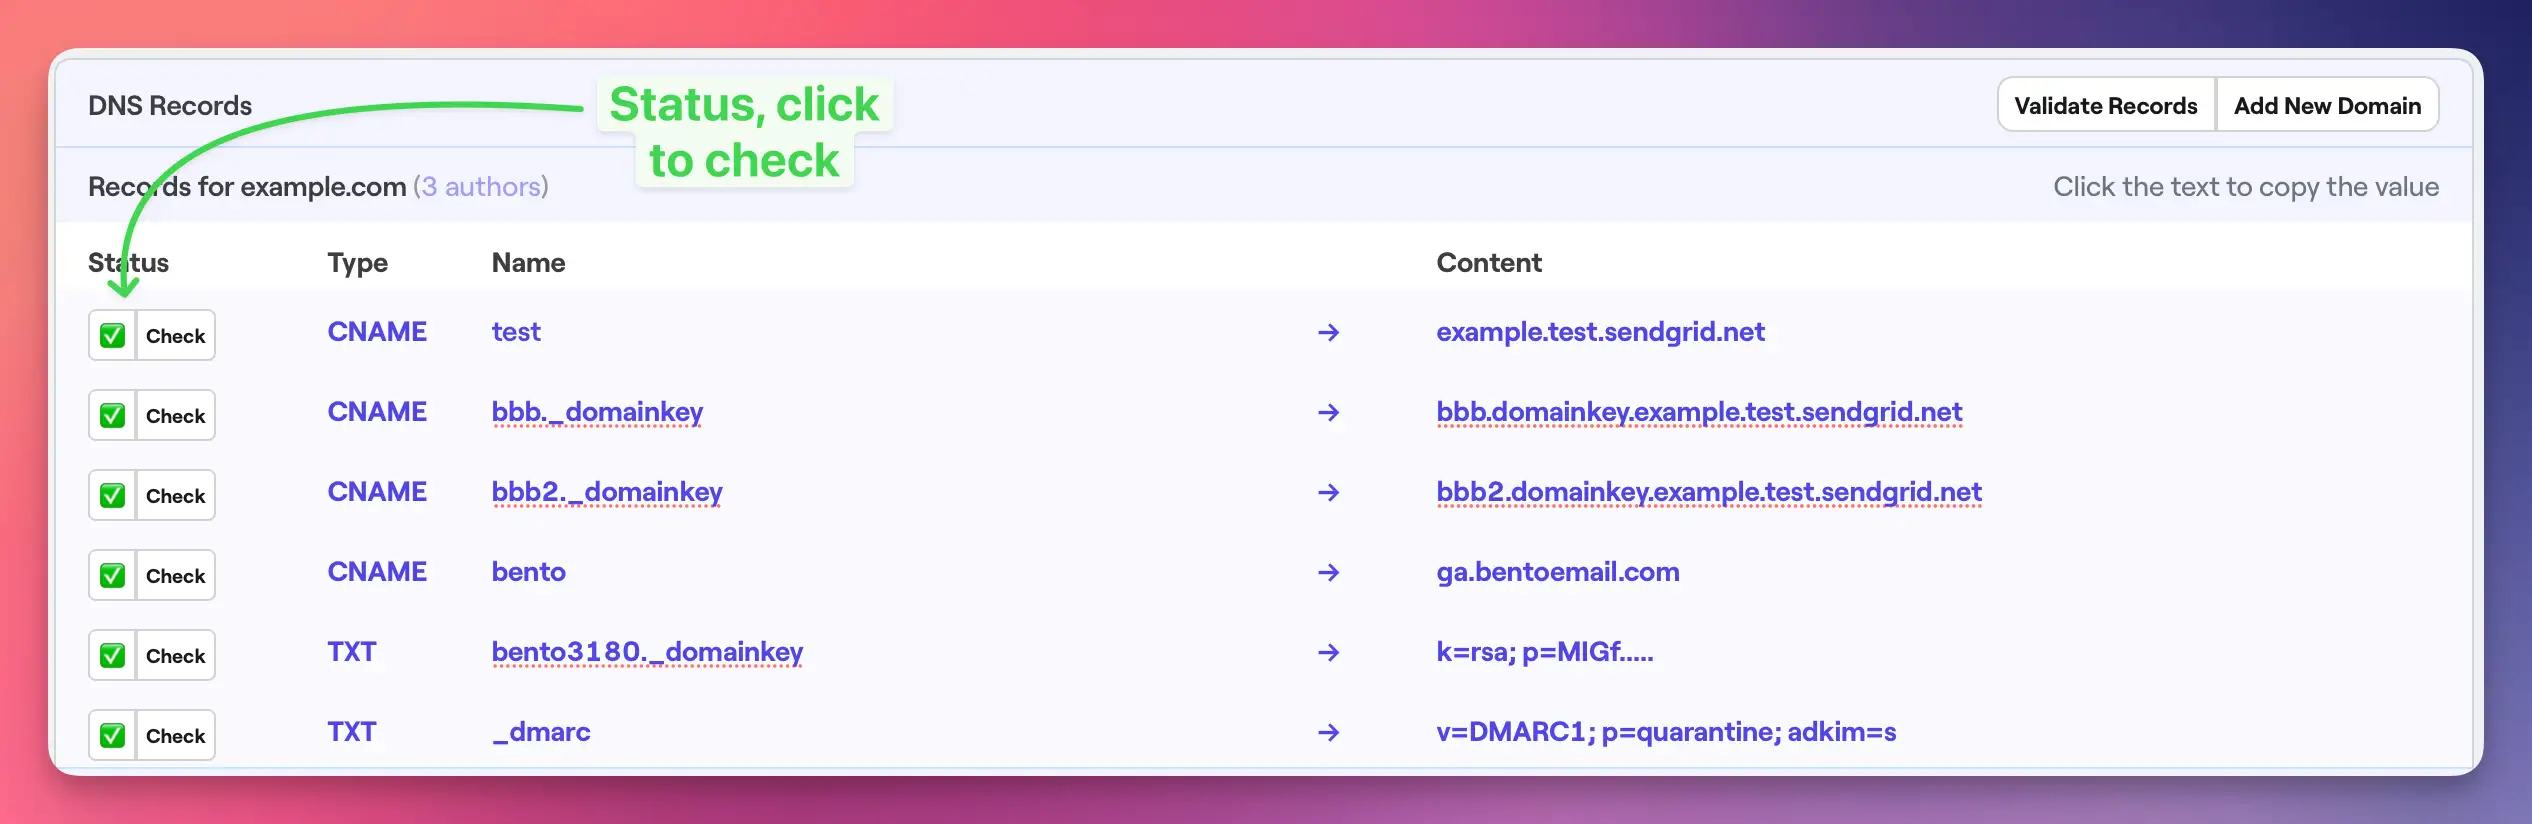
Verify inside Bento
- Return to Bento → System → DNS.
- Wait 5–10 minutes (up to 48 hours for stubborn ISPs).
- Click Check beside each record until the badge turns green.
- Fix any failures by comparing the Hover value to Bento's source of truth.
DNS propagation is not instant. Plan for a delay before retrying verification.
Step 5
Final record audit
- Four CNAMEs saved with the correct Host/Target pairs.
- Two TXT records (DKIM + DMARC) with Bento-provided values.
- All rows show the default TTL and an active status icon.
- Bento's DNS checker shows six green checks after propagation.
Hover-specific notes
- Hover labels the CNAME fields as Host Name and Target Name.
- TXT entries never auto-wrap—paste the entire DKIM key without manual quotes.
- Default TTL is 1 hour; leave it alone unless Hover support tells you otherwise.
- DNS changes usually propagate within 1–2 hours, but allow up to 48 hours globally.
Troubleshooting
- Records failing verification? Confirm you used the exact Bento values (no extra domain suffix).
- TXT formatting errors are common—Hover accepts long strings without inserting quotes.
- Use https://dnschecker.org to confirm new records before retrying Bento's checker.
- Only add new records; do not edit or delete existing DNS that powers other services.
Next steps
- Send a test campaign once everything is green in Bento.
- Monitor deliverability during the next few broadcasts.
- Leave DNS untouched unless Bento support asks you to rotate keys.
Need help? Share screenshots in the Bento Discord or reply to support so we can sanity-check your zone.