Namecheap DNS for Bento
Use Namecheap's Advanced DNS view to publish Bento's SPF, DKIM, DMARC, and tracking CNAMEs.
Google/Yahoo now require full authentication for anyone sending 5,000+ emails per day—publish these records before you scale.
Prerequisites
- Access to the Namecheap account that owns the domain.
- Domain must be using Namecheap BasicDNS or PremiumDNS.
- Bento DNS record set from System → DNS.
Required DNS records
      example              CNAME  example.test.sendgrid.net
bbb._domainkey       CNAME  bbb.domainkey.example.test.sendgrid.net
bbb2._domainkey      CNAME  bbb2.domainkey.example.test.sendgrid.net
bento                CNAME  ga.bentoemail.com
bento3180._domainkey TXT    k=rsa; p=example...
_dmarc               TXT    v=DMARC1; p=quarantine; adkim=s
Copy/paste directly from Bento. Enter only the subdomain in the Host field—Namecheap adds the root domain automatically.
Step 1
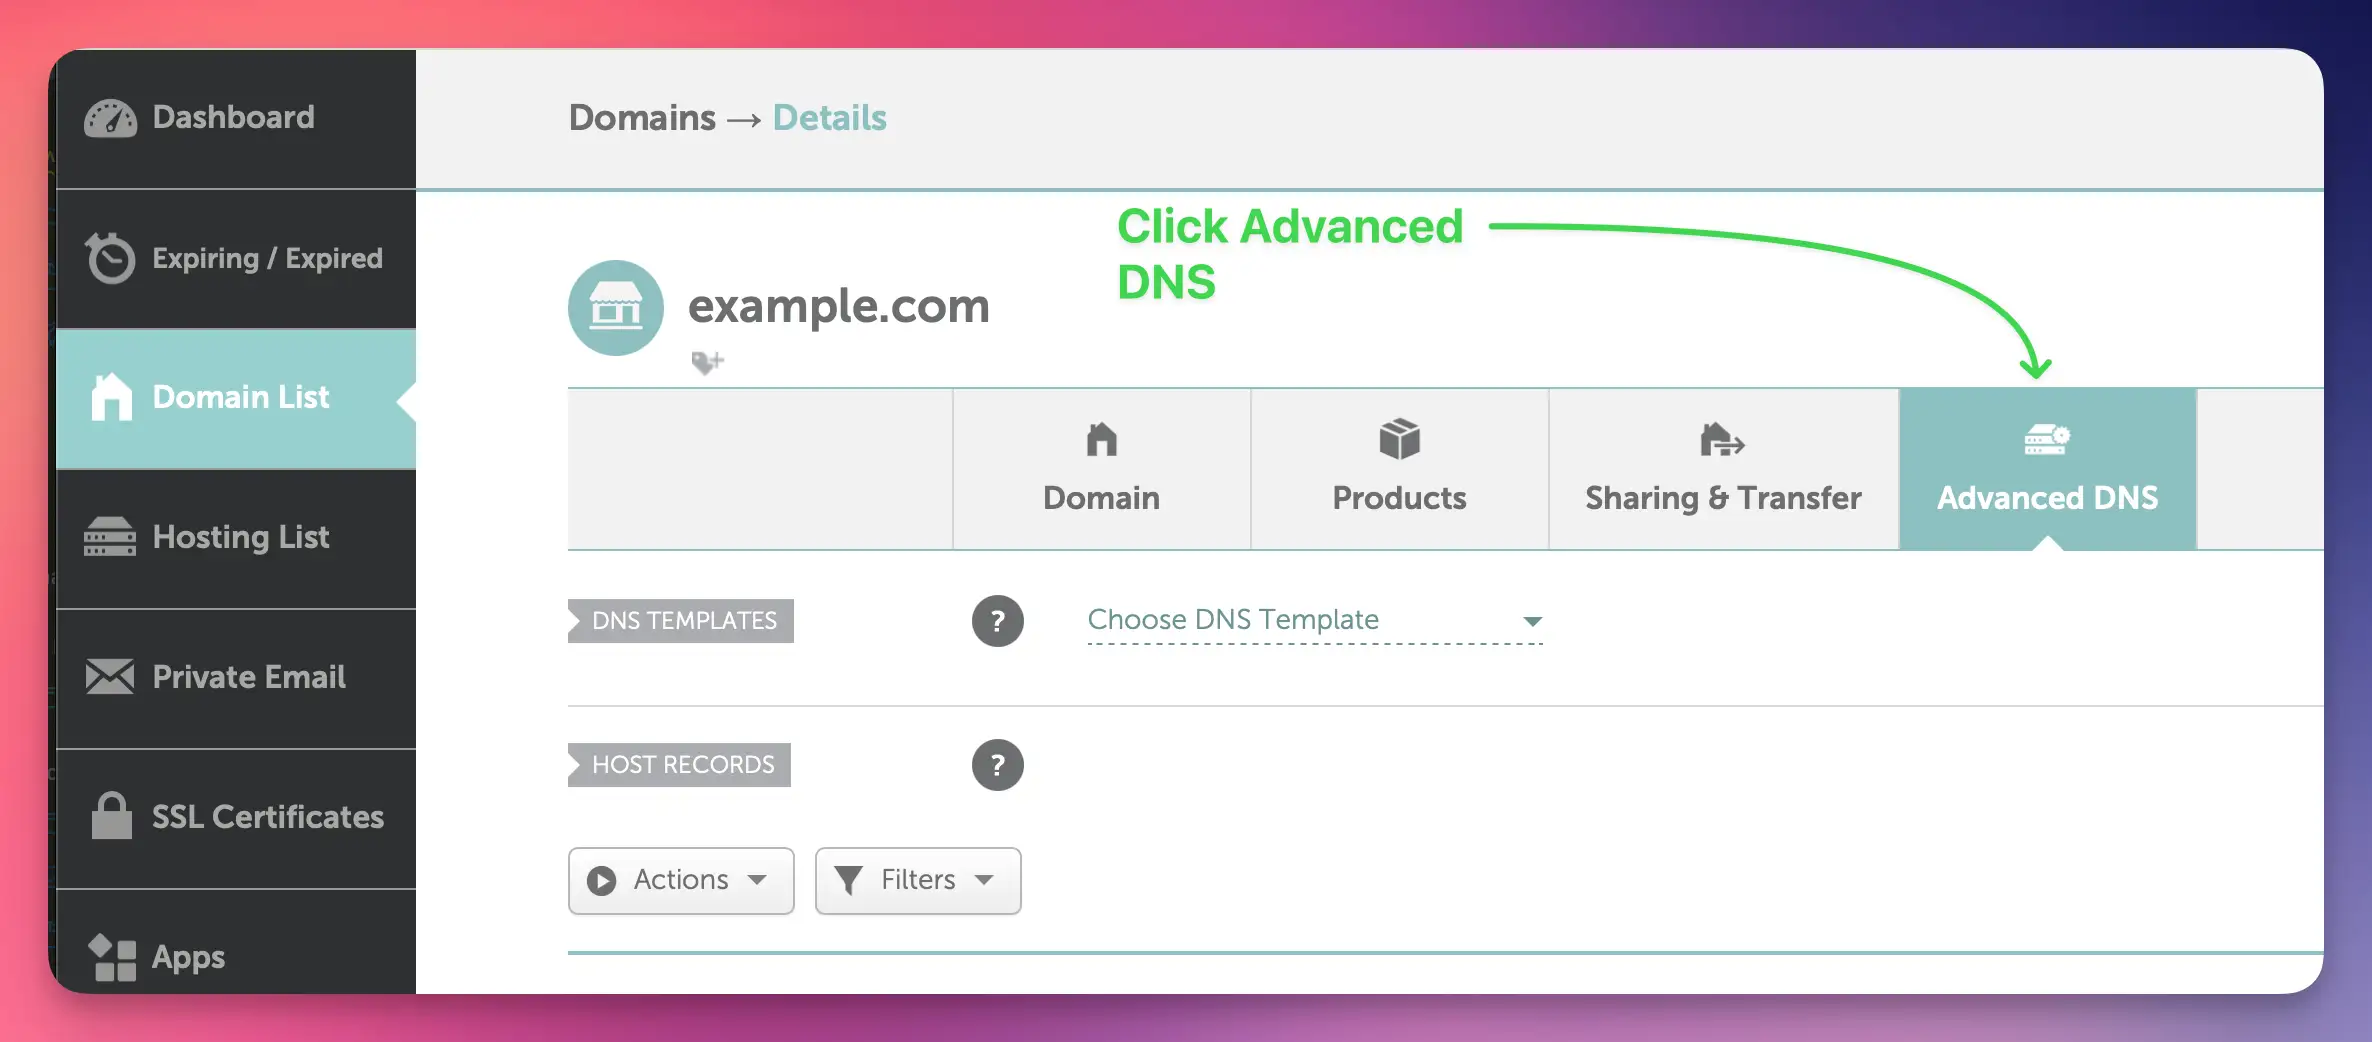
Open Advanced DNS
- Sign in at namecheap.com.
- Go to Domain List, select the sending domain, then click Manage.
- Switch to the Advanced DNS tab.
- If the tab is hidden, the domain uses external nameservers—edit DNS at that provider instead.
External DNS? Make these changes wherever the nameservers point—Namecheap's UI will not apply them.
Step 2
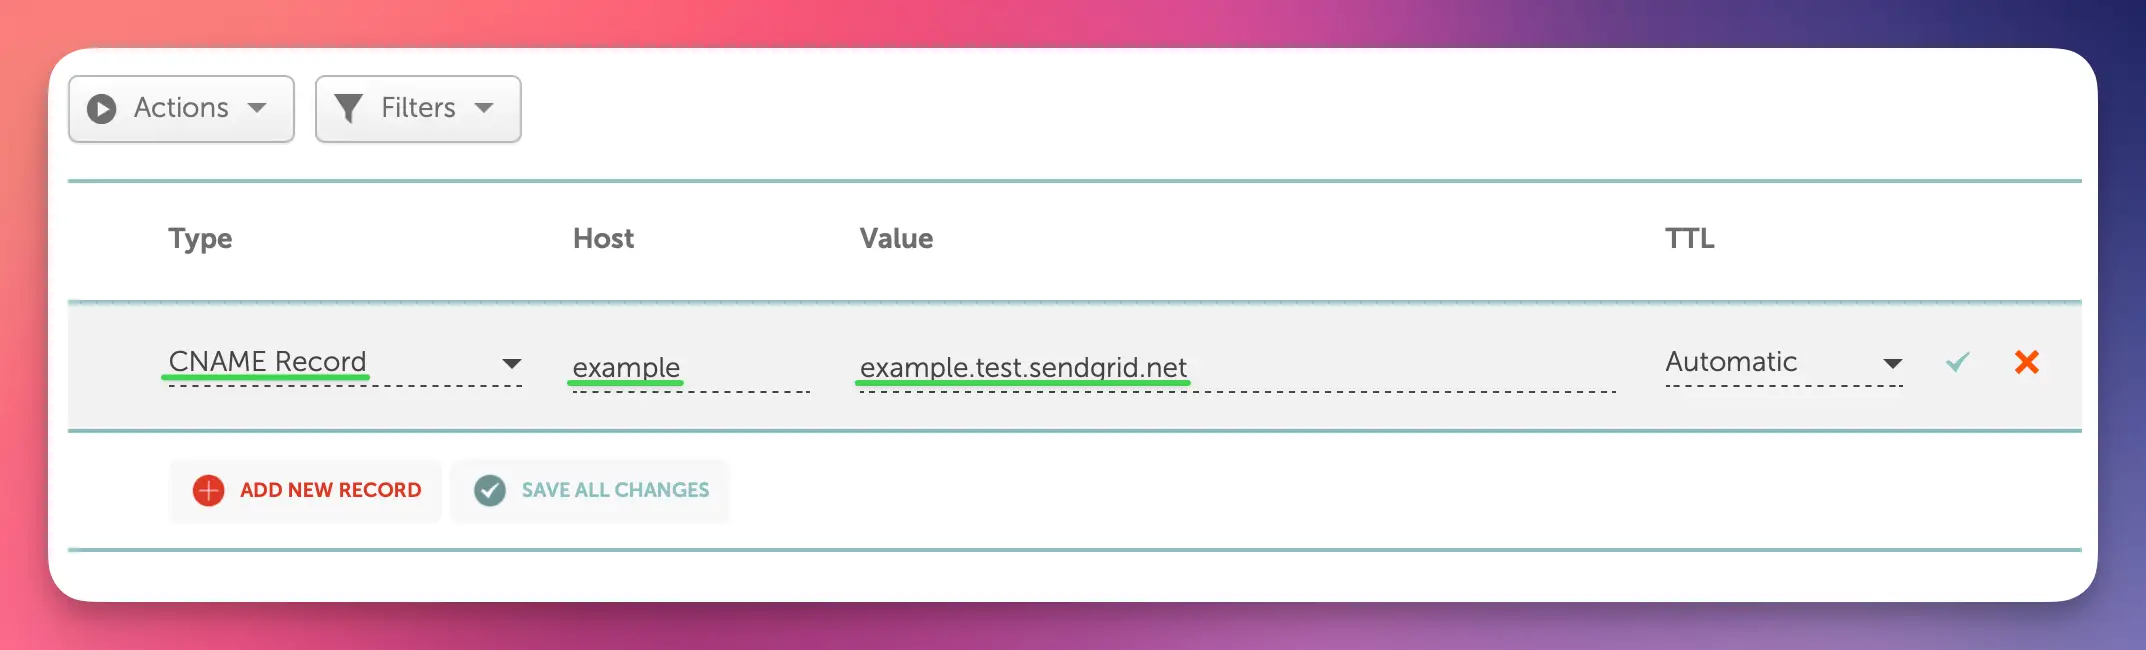
Add the CNAME records
- Click Add New Record → choose CNAME Record.
- Type the Bento host under Host (example,
bbb._domainkey). - Paste the target hostname inside Value.
- Keep TTL set to Automatic.
- Click the green checkmark to save, then repeat for the remaining three CNAMEs.
Namecheap strips the domain from Host automatically—enter only the subdomain, not the full FQDN.
Step 3
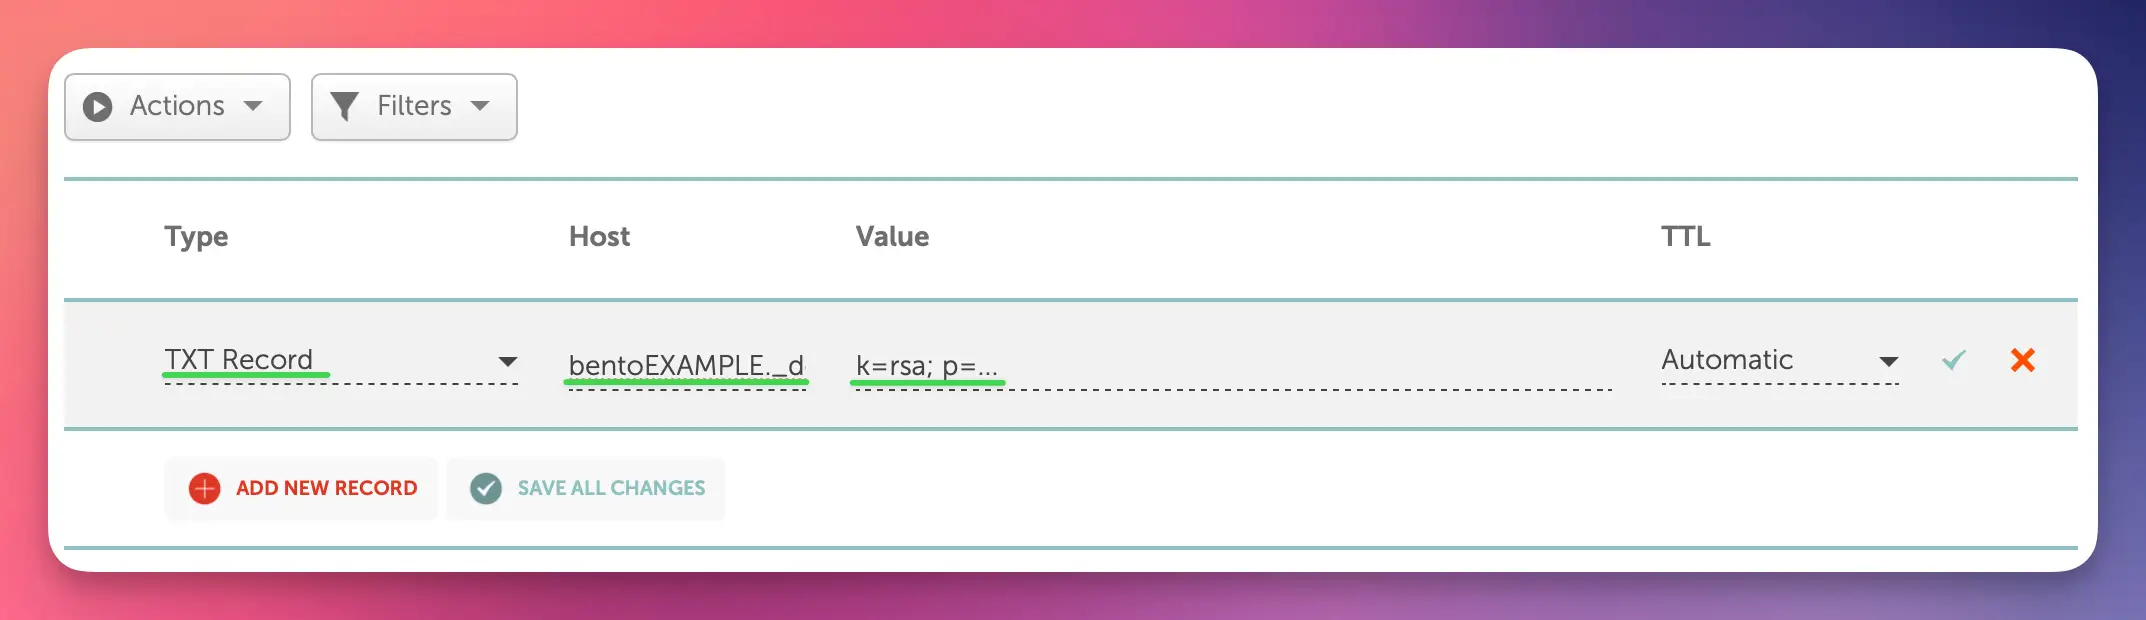
Add the TXT records
- Click Add New Record again → choose TXT Record.
- For DKIM, set Host to the Bento selector (for example
bento1234._domainkey). - Paste the full DKIM value under Value.
- Add another TXT record for DMARC with host
_dmarcand the Bento policy string. - Leave TTL on Automatic and save after each row.
DKIM strings are long—copying directly from Bento prevents truncation errors.
Step 4
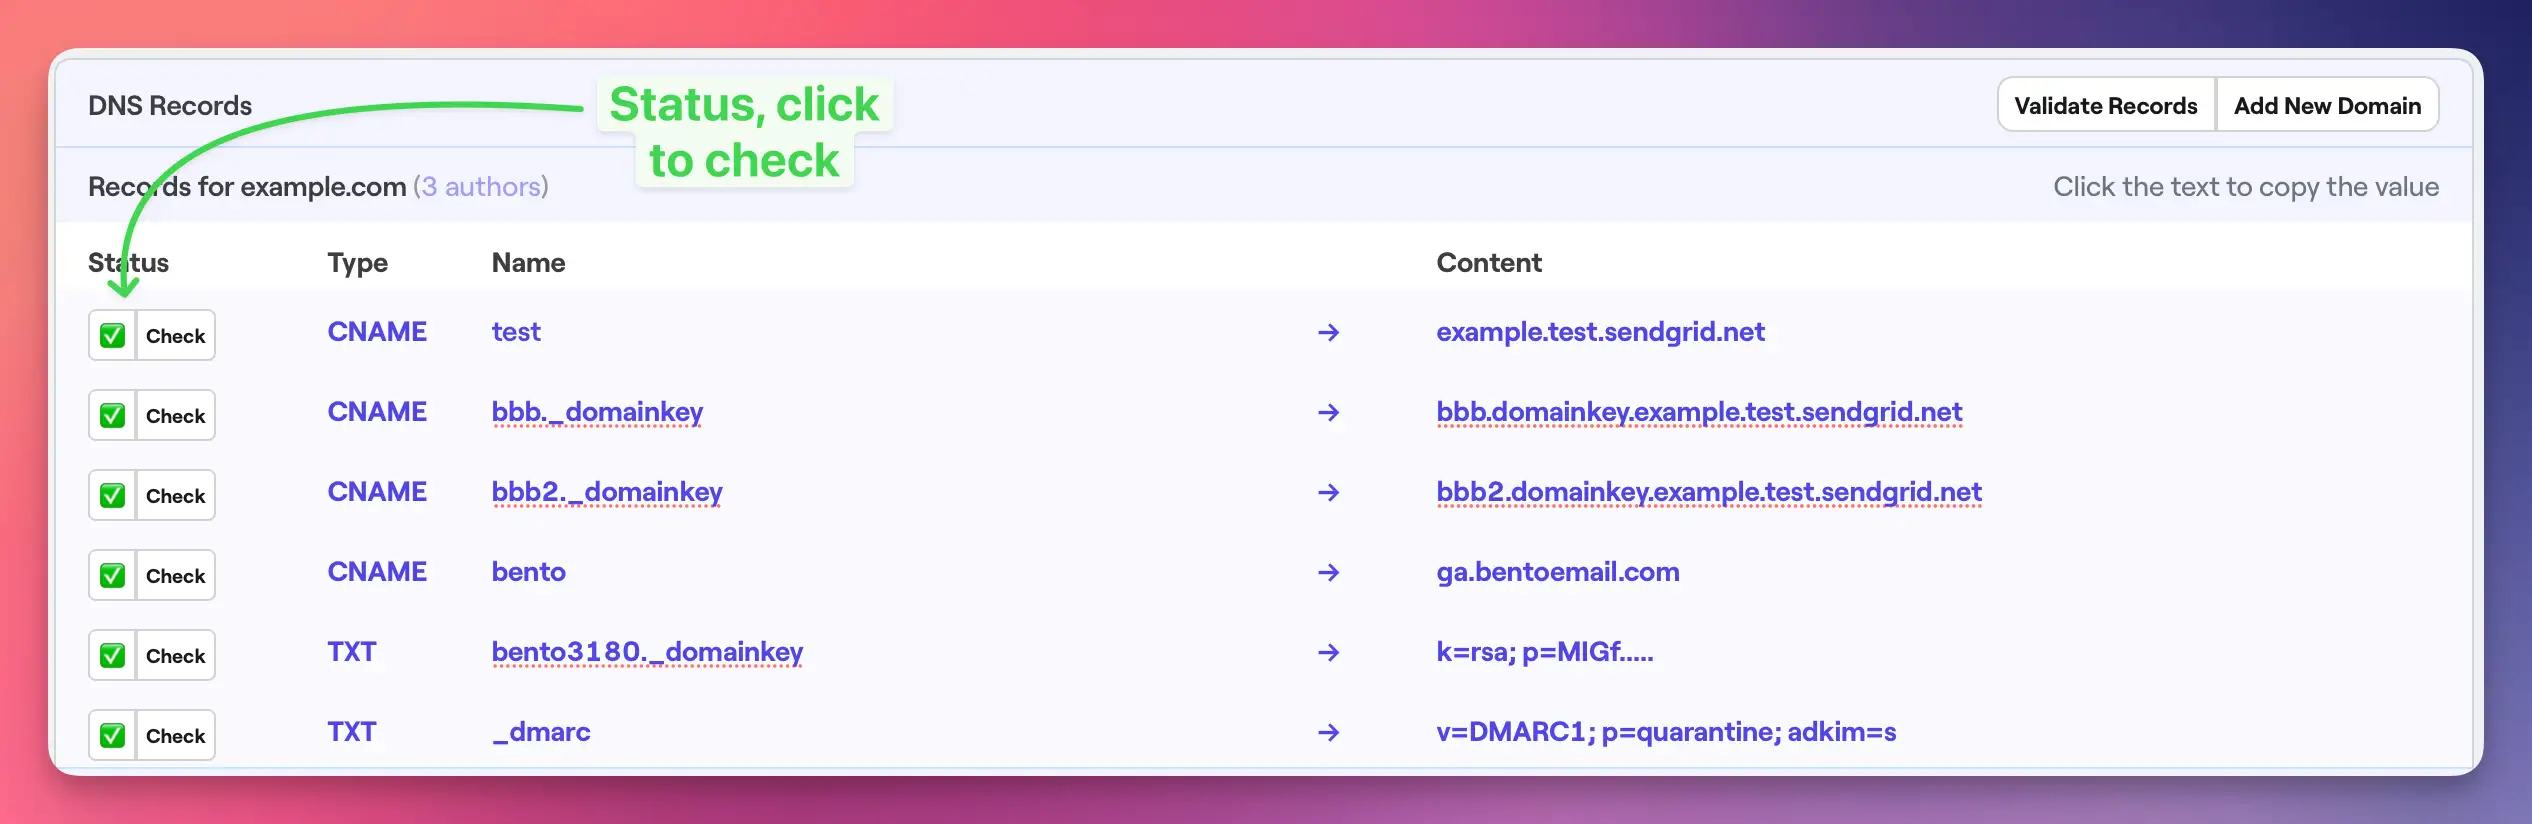
Verify inside Bento
- Open Bento → System → DNS.
- Wait 5–10 minutes (some regions take up to 48 hours).
- Click Check next to each record until the pill turns green.
- Fix any failures by matching the Bento source of truth against Namecheap's fields.
Propagation delay is normal—avoid deleting/re-adding records unless you spot an actual typo.
Step 5
Final record audit
- Four CNAME rows with the right Host/Target pairs and Automatic TTL.
- Two TXT rows for DKIM + DMARC using Bento's exact values.
- Green checkmarks beside every new record in Namecheap.
- All six entries show green badges inside Bento after verification.
Namecheap-specific notes
- The Host field never needs your full domain—Namecheap auto-appends it.
- Always click the green checkmark after every record or it will not save.
- Automatic TTL equals 1 hour; keep it unless support instructs otherwise.
- DNS changes usually propagate in under four hours, but allow up to 48 hours globally.
Troubleshooting
- Records still pending? Refresh the page to confirm you saved them (look for the green check).
- DKIM TXT strings are long—copy directly from Bento to avoid truncation.
- If Advanced DNS is unavailable, you are pointing at external nameservers; edit records where the zone lives.
- Use https://dnschecker.org to confirm propagation before retrying Bento's verifier.
Next steps
- Send a test campaign to confirm branding + deliverability.
- Monitor the first few sends for open/click health.
- Leave DNS untouched until you intentionally rotate keys.
Questions? Drop screenshots inside the Bento Discord or reply to support for a quick review.